Introduction
When it concerns boosting your home's value and curb appeal, couple of financial investments are as advantageous as setting up a fence. Amongst the different fencing options readily available today, Colorbond steel fences stick out for their sturdiness, visual appeal, and low upkeep requirements. This guide will walk you through the procedure of installing a Colorbond fence action by step, making sure that you have all the details you need to make an informed decision.
Whether you're a do it yourself enthusiast or somebody looking to employ experts, this step-by-step guide to installing a Colorbond steel fence will provide valuable insights. So let's get started!
What is a Colorbond Fence?
Understanding Colorbond Fencing Materials
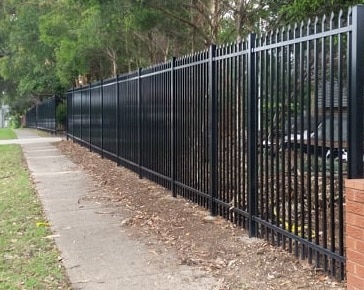
A Colorbond fence is made from top quality steel covered with a durable paint surface. The unique production process includes galvanizing the steel to avoid rust and rust, making it an ideal choice for numerous climates.
Benefits of Picking Colorbond Steel Fencing
- Durability: Colorbond fences can hold up against harsh weather without contorting or cracking. Low Upkeep: Unlike timber fences that require regular painting or staining, Colorbond fences just require periodic cleaning. Variety of Designs: Readily available in several colors and designs, they can fit any home design.
A Step-by-Step Guide to Installing a Colorbond Steel Fence
Step 1: Planning Your Installation
Choosing the Right Location
Before diving into installation, it's vital to identify where your fence will go. Consider property lines and regional zoning guidelines.
Obtaining Necessary Permits
Check with your local council relating to any licenses needed for setting up a fence. This can conserve you from future headaches.
Step 2: Event Required Tools and Materials
Essential Tools for Installation
- Tape measure Level Post hole digger Hammer Screwdriver String line
Materials Needed for Your Colorbond Fence
- Colorbond panels (length varies based upon your requirements) Gate hinges and locks (if appropriate) Steel posts Concrete mix
Step 3: Defining Your Fence Line
Using String Lines for Accuracy
To ensure https://rentry.co/riacifhn your fence is straight, run string lines in between stakes marking the corners of your setup area. This visual guide will be vital during installation.
Measuring Ranges Between Posts
Typically, posts need to be spaced about 2.4 meters apart to provide optimal support for the panels.
Step 4: Digging Post Holes
Determining Hole Depth and Width
Post holes must be dug deep enough to support the height of the fence while enabling concrete setting. A depth of a minimum of 600mm is generally recommended.
Using Proper Tools for Digging
Employing a post hole digger or auger will assist you accomplish tidy holes quickly and efficiently.
Step 5: Establishing Steel Posts
Placing Posts in Holes Correctly
Position each post upright in its particular hole. Guarantee it aligns with your string line before protecting it in place.
Mixing Concrete for Stability
Prepare concrete mix according to package directions and pour it around each post until fully encased. Enable adequate time for curing.
Step 6: Setting up Panels In Between Posts
Aligning Panels Correctly
Once the posts are set and treated, begin connecting your panels in between them. Start from one end and work your way to preserve consistency.
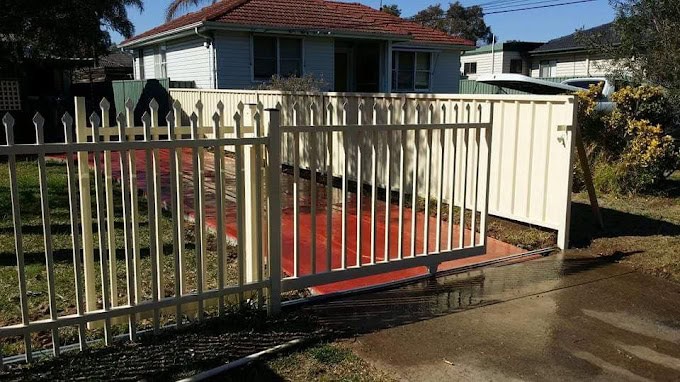
Step 7: Adding Gates (If Necessary)
Choosing the Right Gate Size
Gates ought to be broad enough for simple access however not so wide that they compromise security. Generally, gates range from 1 meter to 1.2 meters wide.
Hanging Gates Properly
Use strong hinges created particularly for heavy gates and guarantee they are level when installed.
Continued Development of Each Area ...
(The article would continue broadening on each step in detail including fixing typical issues during setup, exploring different designs readily available in Colorbond fencing, discussing maintenance ideas post-installation, etc)
FAQs
What is the typical cost of installing a Colorbond steel fence?
The typical cost can vary significantly depending on products used, labor expenses, and length required; typically ranging from $75 to $150 per meter installed.
How long do Colorbond fences last?
With appropriate setup and care, Colorbond fences can last upwards of 30 years or more without substantial wear or tear.
Can I set up a Colorbond fence myself?
Yes! Lots of house owners choose DIY installations; nevertheless, if you're uncertain about any action or absence tools, hiring experts may be best.
Do I need permission from my next-door neighbor before installing a fence?
It's always polite-- and in some cases legally needed-- to inform neighbors about prepared setups that might impact shared boundaries.
Are Colorbond fences ecologically friendly?
Yes! The steel utilized in Colorbond fencing is recyclable at the end of its life cycle which lessens ecological impact compared to some other materials.
What colors are readily available for Colorbond fencing?
Colorbond offers a comprehensive range of over 14 colors designed to match numerous aesthetics-- from earthy tones to vibrant hues!
Conclusion
Installing a Colorbond steel fence not only improves your property's aesthetic appeals however likewise supplies increased security while being extremely low-maintenance. By following this step-by-step guide, you're geared up with all required knowledge-- from preparing through setup-- guaranteeing success every step of the way!
Remember that investing time into comprehending each stage can lead you towards accomplishing that perfect balance in between performance and style while including value to your home!
This short article serves as a comprehensive resource that guides readers through every aspect of installing a Colorbond steel fence By leveraging actionable insights together with practical suggestions throughout this journey-- anybody can become skilled at setting up their own robust fencing solution!